Skip to content

Install OwnCloud4 on Debian12

Linux Systems Guides
  • sudo apt install lsb-release ca-certificates curl -y
    

    GPG key and repo for php 7.4

    sudo curl -sSLo /usr/share/keyrings/deb.sury.org-php.gpg https://packages.sury.org/php/apt.gpg
    
    sudo sh -c 'echo "deb [signed-by=/usr/share/keyrings/deb.sury.org-php.gpg] https://packages.sury.org/php/ $(lsb_release -sc) main" > /etc/apt/sources.list.d/php.list'
    

    Update the system with the new repository in place

    sudo apt update
    

    Install the dependencies for OwnCloud (LAMP ect) Certbot, or LetsEncrypt is being installed as well, if you are using this installation in a public domain

    sudo apt install apache2 mariadb-server imagemagick certbot python3-certbot-apache smbclient redis-server unzip rsync libapache2-mod-php7.4 php7.4 php7.4-intl php7.4-mysql php7.4-mbstring php7.4-imagick php7.4-igbinary php7.4-gmp php7.4-bcmath php7.4-curl php7.4-gd php7.4-zip php7.4-imap php7.4-ldap php7.4-bz2 php7.4-ssh2 php7.4-common php7.4-json php7.4-xml php7.4-dev php7.4-apcu php7.4-redis libsmbclient-dev php-pear php-phpseclib
    

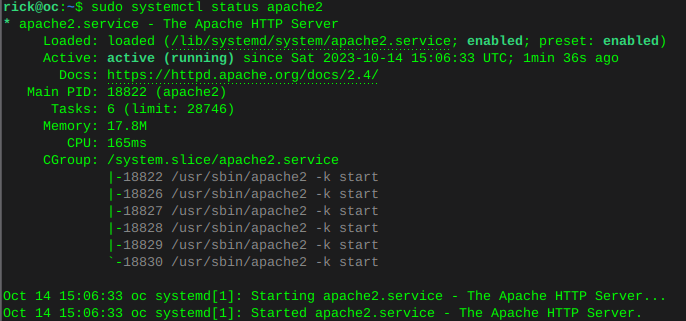
    Enable apache2 and then verify it’s status

    sudo systemctl is-enabled apache2
    
    sudo systemctl status apache2
    

    oc-apache.png Enable MariaDB and verify status

    sudo systemctl is-enabled mariadb
    
    sudo systemctl status mariadb
    

    oc-maria.png Enable Redis and verify status

    sudo systemctl is-enabled redis
    
    sudo systemctl status redis
    

    oc-redis.png

    Configure default php version

    sudo update-alternatives --config php
    

    oc-php-alternatives.png oc-php-ver.png

    Configure php OwnCloud dependencies

    sudo update-alternatives --set phar /usr/bin/phar7.4
    
    sudo update-alternatives --set phar.phar /usr/bin/phar.phar7.4
    
    sudo update-alternatives --set phpize /usr/bin/phpize7.4
    
    sudo update-alternatives --set php-config /usr/bin/php-config7.4
    

    Upgrade Pear to OwnCloud4 requirements

    sudo mkdir -p /tmp/pear/cache
    
    sudo pear upgrade --force --alldeps http://pear.php.net/get/PEAR-1.10.13
    

    oc-pear-up.png

    sudo pear clear-cache
    
    sudo pear update-channels
    
    sudo pear upgrade --force
    
    sudo pear upgrade-all
    

    Verify Pear version

    pear version
    

    oc-pear-ver.png

    Configure MariaDB

    sudo mariadb-secure-installation
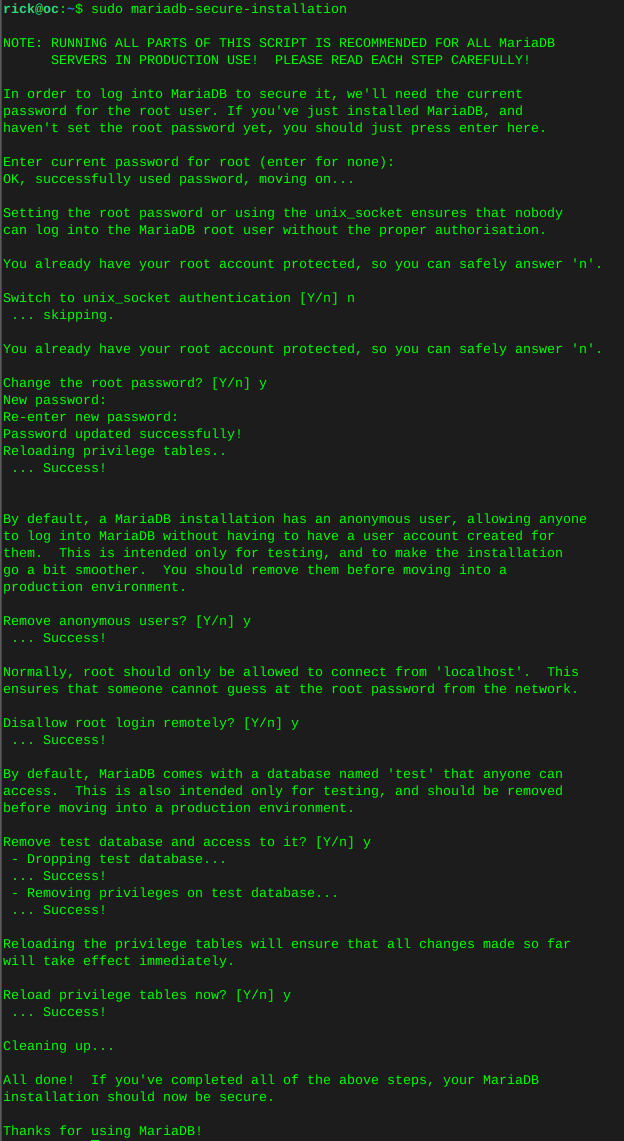
    

    oc-mariadb-setup.png

    Log into MariaDB

    sudo mariadb -u root -p
    

    Create the OwnCloud database:

    This is where many go wrong, we do not use ‘password’ we replace password, with our own password.

    CREATE DATABASE owncloud;
    

    We just created a database with the name owncloud

    CREATE USER IF NOT EXISTS 'owncloud'@'localhost' IDENTIFIED BY 'password';
    

    We just created a database user called owncloud

    GRANT ALL PRIVILEGES ON owncloud.* TO 'owncloud'@'localhost' WITH GRANT OPTION;
    

    We just allowed user owncloud, full privileges on database owncloud

    FLUSH PRIVILEGES;
    

    Now verify what we have just done:

    SHOW GRANTS FOR 'owncloud'@'localhost';
    

    You can see below I named this database ‘oc’ and the ‘oc’ user has privileges on database ‘owncloud’

    oc-db-priv.png

    quit;
    

    wget the OwnCloud source

    cd /var/www
    
    wget https://download.owncloud.com/server/stable/owncloud-complete-latest.tar.bz2
    

    Grab sha256 to verify the download

    wget https://download.owncloud.com/server/stable/owncloud-complete-latest.tar.bz2.sha256
    

    BEFORE installing, verify if the download of OwnCloud matches what the OwnCloud team wanted you to have, this is important always.

    sudo sha256sum -c owncloud-complete-latest.tar.bz2.sha256 < owncloud-complete-latest.tar.bz2
    

    Out put should say ‘OK’ if everything matches.

    Change ownership of the directory to www-data user.

    sudo chown -R www-data:www-data /var/www/owncloud
    

    Configure Vhost for OwnCloud

    This will open a new file in 'sites-available and name this file ‘owncloud.conf’

    Change the ServerName and ServerAlias, as well as log file names, to whatever your domain is. There are many ways to do this keep in mind.

    sudo nano /etc/apache2/sites-available/owncloud.conf
    
    <VirtualHost *:80>
      ServerName oc
      ServerAlias www.oc
    
      DocumentRoot /var/www/owncloud
      
      ErrorLog ${APACHE_LOG_DIR}/oc.io-error.log
      CustomLog ${APACHE_LOG_DIR}/oc.io-access.log combined
    
      Alias /owncloud "/var/www/owncloud/"
    
      <Directory /var/www/owncloud/>
        Options +FollowSymlinks
        AllowOverride All
    
        <IfModule mod_dav.c>
        Dav off
        </IfModule>
    
        SetEnv HOME /var/www/owncloud
        SetEnv HTTP_HOME /var/www/owncloud
    
      </Directory>
     
    </VirtualHost>
    

    Enable and verify the owncloud vhost

    sudo a2ensite owncloud.conf
    
    sudo apachectl configtest
    

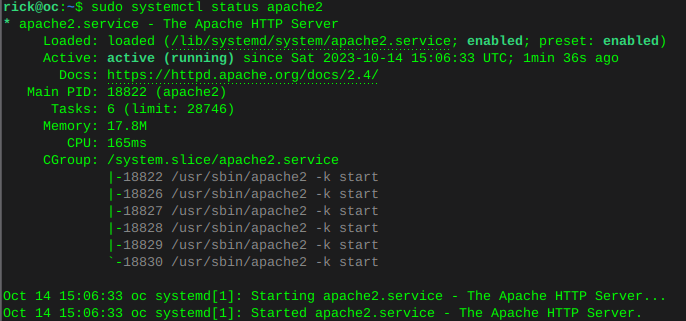
    oc-apache.png


    Now install OwnCloud

    Change the database name, user, and password to whatever you named the OwnCloud database earlier;

    Change the ‘admin user’ and ‘admin pass’ to whatever you want the new OwnCloud admin account to be.

    sudo -u www-data /var/www/owncloud/occ maintenance:install \
       --database "mysql" \
       --database-name "owncloud" \
       --database-user "owncloud"\
       --database-pass "password" \
       --admin-user "admin" \
       --admin-pass "your new owncloud admin password"
    

    Edit the OwnCloud config file to add the domain you used earlier in the Apache2 vhost file:

    sudo nano /var/www/owncloud/config/config.php
    
    'trusted_domains' =>
      array (
        0 => 'localhost',
        1 => 'whatever your domain is goes here',
      ),
    

    Personally I restart the server at this point, which will restart all services. Then visit the domain / IP of your settings and you should see the OwnCloud login page. Use the credentials you setup for the admin user.


    System cron setting:

    sudo crontab -u www-data -e
    
    */15  *  *  *  * /usr/bin/php -f /var/www/owncloud/occ system:cron
    

    Memcache with Redis we installed earlier:

    sudo nano /var/www/owncloud/config/config.php
    
        'filelocking.enabled' => true,
        'memcache.local' => '\OC\Memcache\APCu',
        'memcache.locking' => '\OC\Memcache\Redis',
        'redis' => [
            'host' => 'localhost',
            'port' => 6379,
        ],
    

    Go restart the server again and enjoy!

FreeBSD Notes
  • rickR

    Locate hard drive and get information

    ls -l /sys/block | grep sd.

    Output:

    lrwxrwxrwx 1 root root 0 Jun 22 06:28 sda -> ../devices/pci0000:00/0000:00:1f.2/ata1/host0/target0:0:0/0:0:0:0/block/sda lrwxrwxrwx 1 root root 0 Jun 22 06:28 sdb -> ../devices/pci0000:00/0000:00:1f.2/ata2/host1/target1:0:0/1:0:0:0/block/sdb lrwxrwxrwx 1 root root 0 Jun 22 06:28 sdc -> ../devices/pci0000:00/0000:00:1f.2/ata3/host2/target2:0:0/2:0:0:0/block/sdc lrwxrwxrwx 1 root root 0 Jun 22 06:28 sdd -> ../devices/pci0000:00/0000:00:1f.2/ata4/host3/target3:0:0/3:0:0:0/block/sdd

    Or for a more detailed view

    strace -e trace=open lsblk NAME MAJ:MIN RM SIZE RO TYPE MOUNTPOINTS sda 8:0 0 3.6T 0 disk ├─data--2-data--2_tmeta 252:3 0 15.9G 0 lvm │ └─data--2-data--2-tpool 252:9 0 3.6T 0 lvm │ ├─data--2-data--2 252:10 0 3.6T 1 lvm │ ├─data--2-vm--101--disk--0 252:11 0 8G 0 lvm │ ├─data--2-vm--103--disk--0 252:12 0 32G 0 lvm │ ├─data--2-vm--107--disk--0 252:13 0 500G 0 lvm │ └─data--2-vm--108--disk--0 252:20 0 100G 0 lvm └─data--2-data--2_tdata 252:6 0 3.6T 0 lvm └─data--2-data--2-tpool 252:9 0 3.6T 0 lvm ├─data--2-data--2 252:10 0 3.6T 1 lvm ├─data--2-vm--101--disk--0 252:11 0 8G 0 lvm ├─data--2-vm--103--disk--0 252:12 0 32G 0 lvm ├─data--2-vm--107--disk--0 252:13 0 500G 0 lvm └─data--2-vm--108--disk--0 252:20 0 100G 0 lvm sdb 8:16 0 698.6G 0 disk └─sdb1 8:17 0 698.6G 0 part /mnt/pve/backups sdc 8:32 0 3.6T 0 disk ├─vm--data-vm--data_tmeta 252:4 0 15.9G 0 lvm │ └─vm--data-vm--data-tpool 252:14 0 3.6T 0 lvm │ ├─vm--data-vm--data 252:15 0 3.6T 1 lvm │ ├─vm--data-vm--100--disk--0 252:16 0 270G 0 lvm │ ├─vm--data-vm--102--disk--0 252:17 0 100G 0 lvm │ ├─vm--data-vm--104--disk--0 252:18 0 25G 0 lvm │ └─vm--data-vm--106--disk--0 252:19 0 32G 0 lvm └─vm--data-vm--data_tdata 252:7 0 3.6T 0 lvm └─vm--data-vm--data-tpool 252:14 0 3.6T 0 lvm ├─vm--data-vm--data 252:15 0 3.6T 1 lvm ├─vm--data-vm--100--disk--0 252:16 0 270G 0 lvm ├─vm--data-vm--102--disk--0 252:17 0 100G 0 lvm ├─vm--data-vm--104--disk--0 252:18 0 25G 0 lvm └─vm--data-vm--106--disk--0 252:19 0 32G 0 lvm sdd 8:48 0 931.5G 0 disk ├─sdd1 8:49 0 1007K 0 part ├─sdd2 8:50 0 1G 0 part └─sdd3 8:51 0 930.5G 0 part ├─pve-swap 252:0 0 8G 0 lvm [SWAP] ├─pve-root 252:1 0 96G 0 lvm / ├─pve-data_tmeta 252:2 0 8.1G 0 lvm │ └─pve-data 252:8 0 794.3G 0 lvm └─pve-data_tdata 252:5 0 794.3G 0 lvm └─pve-data 252:8 0 794.3G 0 lvm +++ exited with 0 +++ cat /proc/partitions major minor #blocks name 8 0 3907018584 sda 8 16 732574584 sdb 8 17 732572672 sdb1 8 32 3907018584 sdc 8 48 976762584 sdd 8 49 1007 sdd1 8 50 1048576 sdd2 8 51 975712967 sdd3 252 0 8388608 dm-0 252 1 100663296 dm-1 252 2 8495104 dm-2 252 3 16650240 dm-3 252 4 16650240 dm-4 252 6 3873329152 dm-6 252 5 832888832 dm-5 252 7 3873329152 dm-7 252 8 832888832 dm-8 252 9 3873329152 dm-9 252 10 3873329152 dm-10 252 11 8388608 dm-11 252 12 33554432 dm-12 252 13 524288000 dm-13 252 14 3873329152 dm-14 252 15 3873329152 dm-15 252 16 283115520 dm-16 252 17 104857600 dm-17 252 18 26214400 dm-18 252 19 33554432 dm-19 252 20 104857600 dm-20

    Locate drive by serial and model information

    hdparm -i /dev/sda /dev/sda: Model=WDC WD4000FYYZ-05UL1B0, FwRev=00.0NS05, SerialNo=WD-WCC132262513 Config={ HardSect NotMFM HdSw>15uSec SpinMotCtl Fixed DTR>5Mbs FmtGapReq } RawCHS=16383/16/63, TrkSize=0, SectSize=0, ECCbytes=0 BuffType=unknown, BuffSize=unknown, MaxMultSect=16, MultSect=off CurCHS=16383/16/63, CurSects=16514064, LBA=yes, LBAsects=7814037168 IORDY=on/off, tPIO={min:120,w/IORDY:120}, tDMA={min:120,rec:120} PIO modes: pio0 pio3 pio4 DMA modes: mdma0 mdma1 mdma2 UDMA modes: udma0 udma1 udma2 udma3 udma4 udma5 *udma6 AdvancedPM=yes: unknown setting WriteCache=disabled Drive conforms to: Unspecified: ATA/ATAPI-1,2,3,4,5,6,7 * signifies the current active mode
    read more

  • rickR

    Screen recording can use webm as their format, it can be more simple to use a gif to embed into a website or forum, than adding scripts to host different video format.

    In this case I grabbed a screen record of the progress for writing zeros to a hard drive with dd

    Use ffmpeg to convert webm to gif:

    First create a pallet:

    Move into the directory which the webm is located, or type in the path

    Where ‘dd.webm’ is the screen recording

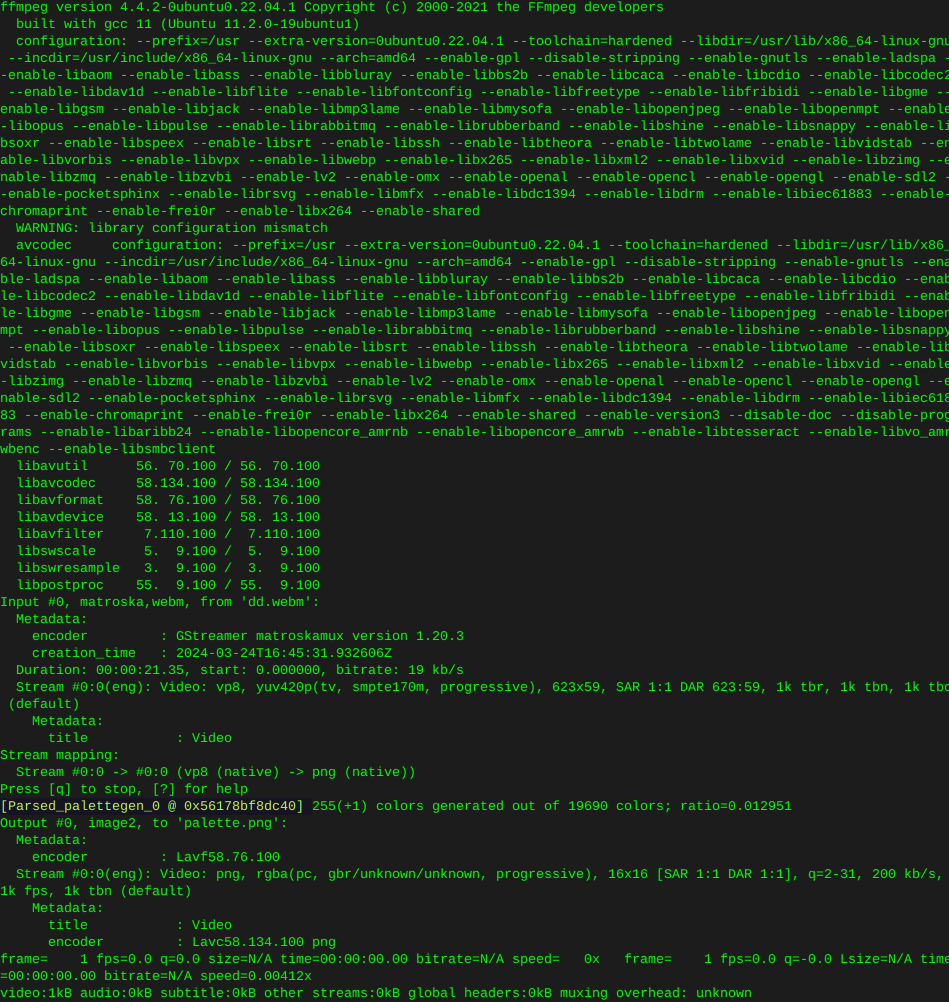
    ffmpeg -y -i dd.webm -vf palettegen palette.png

    Output:

    dd-ffmpeg.png

    Then convert the webm to gif:

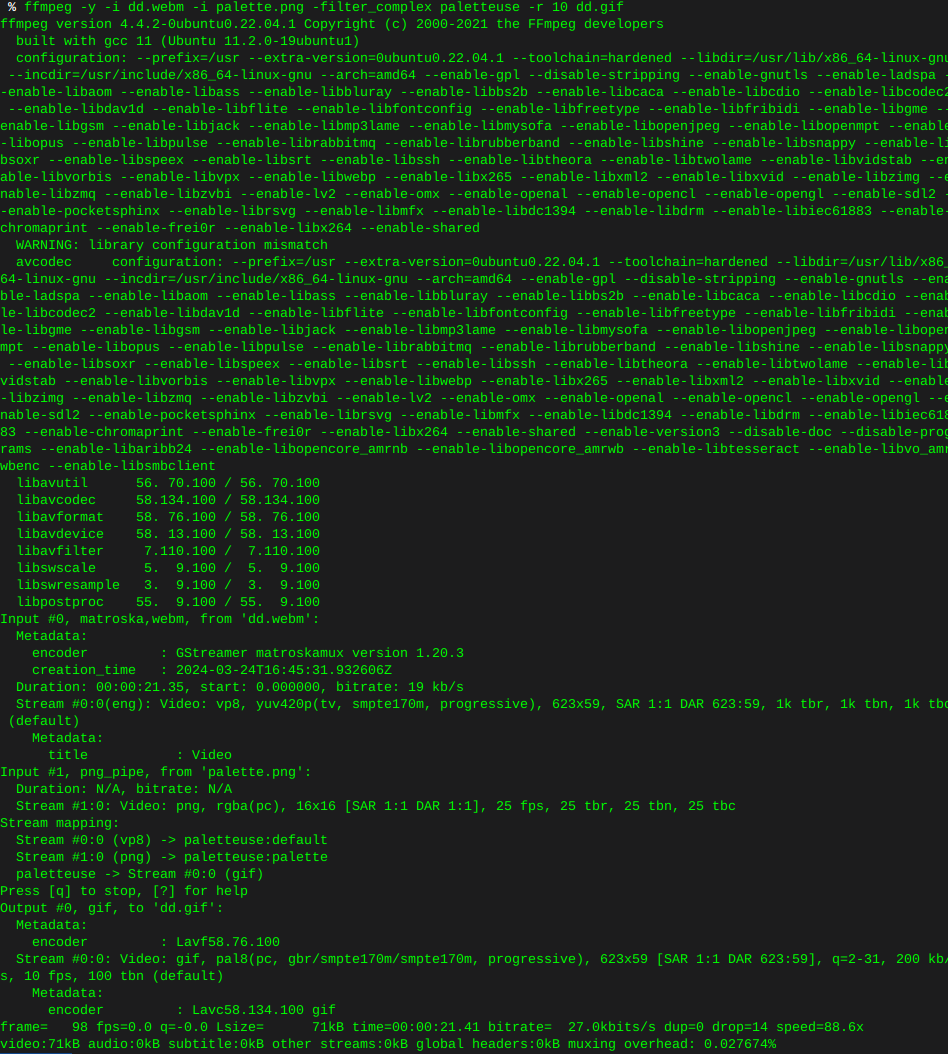
    ffmpeg -y -i dd.webm -i palette.png -filter_complex paletteuse -r 10 dd.gif

    dd-webm-2.png

    This is what I ended up with, looks like any image of any alien on the interwebz, as if shot through a potato, some tweaking of the command is in my future. None the less.

    dd.gif

    read more

  • rickR

    Write zeros to all sectors

    Use the command ‘lsblk’ to find the drive you wish to erase

    I’m using ‘dd’ to erase things

    In this case I’m torching sdb

    Only use status=progress if you care it’s not necessary

    dd if=/dev/zero of=/dev/sdb bs=12M status=progress

    dd.gif

    read more

  • rickR

    Remove old kernel images that are cluttering the system

    zstd-no-space-error.png

    Most of these errors are due to low or not enough space left in the root partition.

    If you are using a Debian flavor:

    sudo apt-get autoremove --purge

    zstd-error.png

    Inform grub whenever an old kernel is removed:

    update grub

    update-grub.png

    Remove the un-used kernel config files:

    These will be the files pre cursed as ‘rc’ where installed kernels use ‘ii’

    … As well as files no longer used or required due to dependencies

    This command will detect, print, and remove left over cruft from previously installed packages or scripts, that have been removed or updated.

    sudo dpkg --purge $(dpkg -l | awk '/^rc/{print $2}')

    purge.png

    You can re-run the following to view the installed kernel(s):

    dpkg --list | grep linux-image

    installed-kernels.png

    read more

  • rickR

    To list all files in current directory including dot files (hidden files or directories), as well as print permissions :

    ls -la
    read more