Install OwnCloud4 on Debian12
-
sudo apt install lsb-release ca-certificates curl -yGPG key and repo for php 7.4
sudo curl -sSLo /usr/share/keyrings/deb.sury.org-php.gpg https://packages.sury.org/php/apt.gpgsudo sh -c 'echo "deb [signed-by=/usr/share/keyrings/deb.sury.org-php.gpg] https://packages.sury.org/php/ $(lsb_release -sc) main" > /etc/apt/sources.list.d/php.list'Update the system with the new repository in place
sudo apt updateInstall the dependencies for OwnCloud (LAMP ect) Certbot, or LetsEncrypt is being installed as well, if you are using this installation in a public domain
sudo apt install apache2 mariadb-server imagemagick certbot python3-certbot-apache smbclient redis-server unzip rsync libapache2-mod-php7.4 php7.4 php7.4-intl php7.4-mysql php7.4-mbstring php7.4-imagick php7.4-igbinary php7.4-gmp php7.4-bcmath php7.4-curl php7.4-gd php7.4-zip php7.4-imap php7.4-ldap php7.4-bz2 php7.4-ssh2 php7.4-common php7.4-json php7.4-xml php7.4-dev php7.4-apcu php7.4-redis libsmbclient-dev php-pear php-phpseclibEnable apache2 and then verify it’s status
sudo systemctl is-enabled apache2sudo systemctl status apache2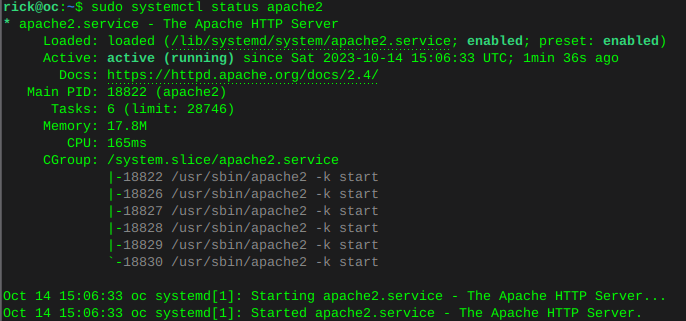 Enable MariaDB and verify status
sudo systemctl is-enabled mariadbsudo systemctl status mariadb Enable Redis and verify status
sudo systemctl is-enabled redissudo systemctl status redis
Configure default php version
sudo update-alternatives --config php

Configure php OwnCloud dependencies
sudo update-alternatives --set phar /usr/bin/phar7.4sudo update-alternatives --set phar.phar /usr/bin/phar.phar7.4sudo update-alternatives --set phpize /usr/bin/phpize7.4sudo update-alternatives --set php-config /usr/bin/php-config7.4Upgrade Pear to OwnCloud4 requirements
sudo mkdir -p /tmp/pear/cachesudo pear upgrade --force --alldeps http://pear.php.net/get/PEAR-1.10.13
sudo pear clear-cachesudo pear update-channelssudo pear upgrade --forcesudo pear upgrade-allVerify Pear version
pear version
Configure MariaDB
sudo mariadb-secure-installation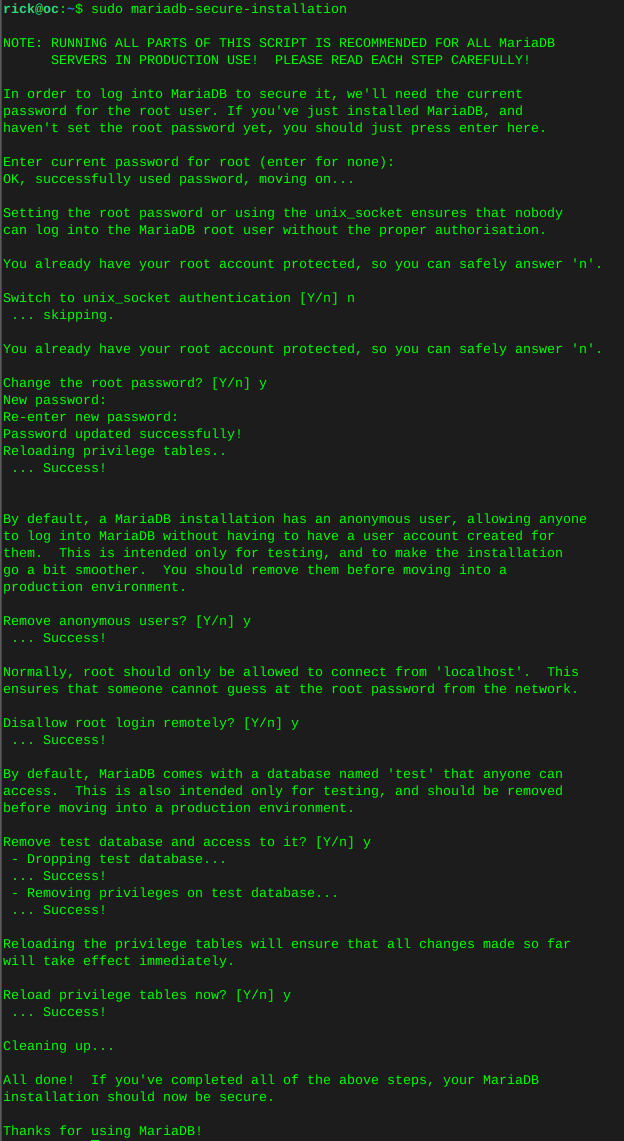
Log into MariaDB
sudo mariadb -u root -pCreate the OwnCloud database:
This is where many go wrong, we do not use ‘password’ we replace password, with our own password.
CREATE DATABASE owncloud;We just created a database with the name owncloud
CREATE USER IF NOT EXISTS 'owncloud'@'localhost' IDENTIFIED BY 'password';We just created a database user called owncloud
GRANT ALL PRIVILEGES ON owncloud.* TO 'owncloud'@'localhost' WITH GRANT OPTION;We just allowed user owncloud, full privileges on database owncloud
FLUSH PRIVILEGES;Now verify what we have just done:
SHOW GRANTS FOR 'owncloud'@'localhost';You can see below I named this database ‘oc’ and the ‘oc’ user has privileges on database ‘owncloud’

quit;
wget the OwnCloud source
cd /var/wwwwget https://download.owncloud.com/server/stable/owncloud-complete-latest.tar.bz2Grab sha256 to verify the download
wget https://download.owncloud.com/server/stable/owncloud-complete-latest.tar.bz2.sha256BEFORE installing, verify if the download of OwnCloud matches what the OwnCloud team wanted you to have, this is important always.
sudo sha256sum -c owncloud-complete-latest.tar.bz2.sha256 < owncloud-complete-latest.tar.bz2Out put should say ‘OK’ if everything matches.
Change ownership of the directory to www-data user.
sudo chown -R www-data:www-data /var/www/owncloud
Configure Vhost for OwnCloud
This will open a new file in 'sites-available and name this file ‘owncloud.conf’
Change the ServerName and ServerAlias, as well as log file names, to whatever your domain is. There are many ways to do this keep in mind.
sudo nano /etc/apache2/sites-available/owncloud.conf<VirtualHost *:80> ServerName oc ServerAlias www.oc DocumentRoot /var/www/owncloud ErrorLog ${APACHE_LOG_DIR}/oc.io-error.log CustomLog ${APACHE_LOG_DIR}/oc.io-access.log combined Alias /owncloud "/var/www/owncloud/" <Directory /var/www/owncloud/> Options +FollowSymlinks AllowOverride All <IfModule mod_dav.c> Dav off </IfModule> SetEnv HOME /var/www/owncloud SetEnv HTTP_HOME /var/www/owncloud </Directory> </VirtualHost>Enable and verify the owncloud vhost
sudo a2ensite owncloud.confsudo apachectl configtest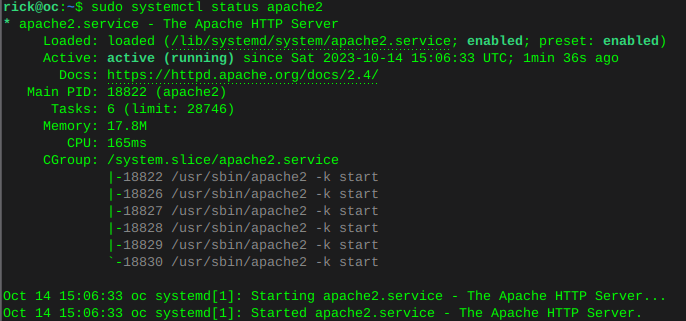
Now install OwnCloud
Change the database name, user, and password to whatever you named the OwnCloud database earlier;
Change the ‘admin user’ and ‘admin pass’ to whatever you want the new OwnCloud admin account to be.
sudo -u www-data /var/www/owncloud/occ maintenance:install \
   --database "mysql" \
   --database-name "owncloud" \
   --database-user "owncloud"\
   --database-pass "password" \
   --admin-user "admin" \
   --admin-pass "your new owncloud admin password"
Edit the OwnCloud config file to add the domain you used earlier in the Apache2 vhost file:
sudo nano /var/www/owncloud/config/config.php'trusted_domains' => array ( 0 => 'localhost', 1 => 'whatever your domain is goes here', ),
Personally I restart the server at this point, which will restart all services. Then visit the domain / IP of your settings and you should see the OwnCloud login page. Use the credentials you setup for the admin user.
System cron setting:
sudo crontab -u www-data -e*/15 * * * * /usr/bin/php -f /var/www/owncloud/occ system:cronMemcache with Redis we installed earlier:
sudo nano /var/www/owncloud/config/config.php'filelocking.enabled' => true, 'memcache.local' => '\OC\Memcache\APCu', 'memcache.locking' => '\OC\Memcache\Redis', 'redis' => [ 'host' => 'localhost', 'port' => 6379, ],Go restart the server again and enjoy!


