Skip to content
0
  • Recent
  • Tags
  • Popular
  • Search
  • ads.txt
  • Recent
  • Tags
  • Popular
  • Search
  • ads.txt
Collapse
Lime-it.us
  1. Home
  2. Categories
  3. Linux Systems
  4. Linux Systems Guides
  5. Locating files with the find command

Locating files with the find command

Scheduled Pinned Locked Moved Linux Systems Guides
1 Posts 1 Posters 1.2k Views 1 Watching
  • Oldest to Newest
  • Newest to Oldest
  • Most Votes
Reply
  • Reply as topic
Log in to reply
This topic has been deleted. Only users with topic management privileges can see it.
  • rickR Offline
    rickR Offline
    rick
    wrote on last edited by rick
    #1

    Locating files using the find command

    The find command is a powerful utility that allows the user to find files located in the file system via criteria such as the file name, when file was last accessed, when the file status was last changed, the file’s permissions, owner, group, size.


    Find a file “foo.bar” that exists somewhere in the file system

    find / -name foo.bar -print

    On most platforms the -print is optional, however, on some systems nothing will be output without it. Without specifications find searches recursively through all directories.


    Find a file without searching network or mounted file systems

    find / -name foo.bar -print -xdev

    This is useful if you have network drives that you know the file would not be located on. “-mount” does the same thing as “-xdev” for compatibility with other versions of find.


    Find a file without showing “Permission Denied” messages

    find / -name foo.bar -print 2>/dev/null

    When find tries to search a directory or file that you do not have permission to read the message “Permission Denied” will be output to the screen. The 2>/dev/null option sends these messages to /dev/null so that the found files are easily viewed.


    Find a file, who’s name ends with .bar, within the current directory and only search 2 directories deep

    find . -name *.bar -maxdepth 2 -print


    Search directories “./dir1” and “./dir2” for a file "foo.bar

    find ./dir1 ./dir2 -name foo.bar -print


    Search for files that are owned by the user “skippie”

    find /some/directory -user skippie -print

    The files output will belong to the user “skippie”. Similar criteria are -uid to search for a user by their numerical id, -group to search by a group name, and -gid to search by a group id number.


    Find a file that is a certain type. “-type l” searches for symbolic links

    find /any/directory -type l -print


    Several types of files can be searched for: Several types of files can be searched for:

    • b block (buffered) special

    • c character (unbuffered) special

    • d directory

    • p named pipe (FIFO)

    • f regular file

    • l symbolic link

    • s socket


    Search for directories that contain the phrase “foo” but do not end in “.bar”

    find . -name '*foo*' ! -name '*.bar' -type d -print

    The “!” allows you to exclude results that contain the phrases following it.

    find becomes extremely useful when combined with other commands. One such combination would be using find and grep together.

    find ~/documents -type f -name '*.txt' \ -exec grep -s DOGS {} \; -print

    1 Reply Last reply
    1
    Reply
    • Reply as topic
    Log in to reply
    • Oldest to Newest
    • Newest to Oldest
    • Most Votes


    FreeBSD Notes
    • rickR
      rick

      3JUgg6grmbJ1wJ4mTU9fUxXGSMK6trSwKq

      read more

    • rickR
      rick

      IMG_4307.jpeg

      read more

    • rickR
      rick

      redis.png

      Create a shell script that will dump the Redis database

      cd ~ mkdir redi-backups-script cd redis-backups-script nano redis_backups-script.sh

      Paste the script below:

      #!/bin/bash rdb_file="/Place-directory-of-rdb-here/redis/dump.rdb" redis_cli="/usr/bin/redis-cli" DIR=`date +%d-%m-%y` DEST=~/redis_backups/$DIR mkdir $DEST echo save| $redis_cli exit 1

      Set script to executable:

      chmod +x ~/scripts/redis_backups-script.sh

      Create a cron to run daily:

      Then create a cron job to run the script every day at midnight:

      crontab -e 0 0 * * * ~/redis-backups-script/redis_backup.sh

      Restore RDB backup

      Disable Append Only in the config:

      nano /etc/redis/redis.conf appendonly no

      Stop redis:

      sudo service redis-server stop

      Restore the redis backup:

      rename the rdb file you wish sudo cp /home/redis/dump.rdb /home/redis/dump.rdb.bak

      You can then copy the backup rdb file as follows:

      sudo cp /redis_backups/------/dump.rdb /home/redis/dump.rdb

      Apply the proper permissions to the dump.rdb file:

      sudo chmod 660 /home/redis/dump.rdb

      Re-starting Redis server

      sudo service redis-server start
      read more

    • rickR
      rick

      Install Zabbix 7.2 repo

      wget https://repo.zabbix.com/zabbix/7.2/release/debian/pool/main/z/zabbix-release/zabbix-release_latest_7.2+debian12_all.deb

      zab1.png

      dpkg -i zabbix-release_latest_7.2+debian12_all.deb

      zab2.png

      Update repos

      apt update

      zab3.png

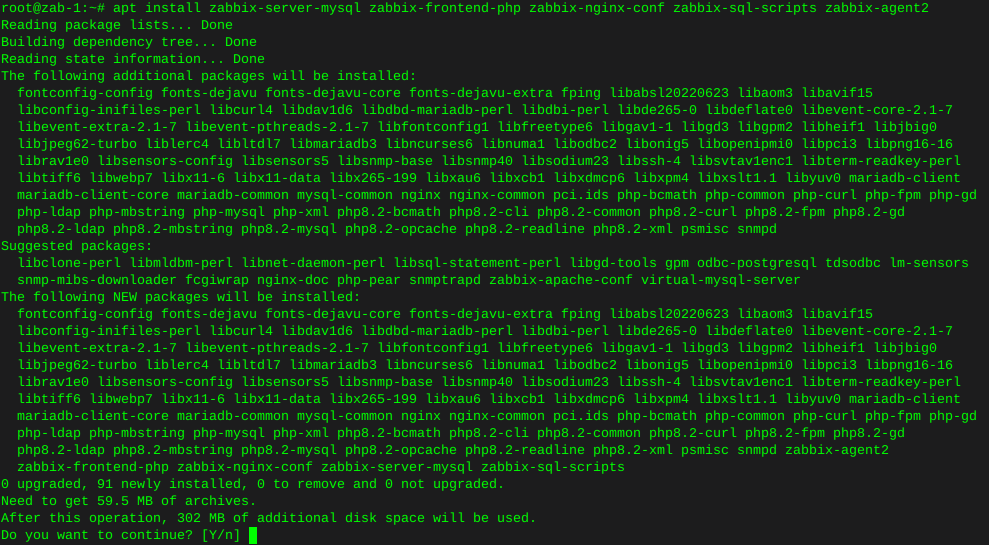
      Install Zabbix server and frontend

      apt install zabbix-server-mysql zabbix-frontend-php zabbix-nginx-conf zabbix-sql-scripts zabbix-agent2

      zab4.png

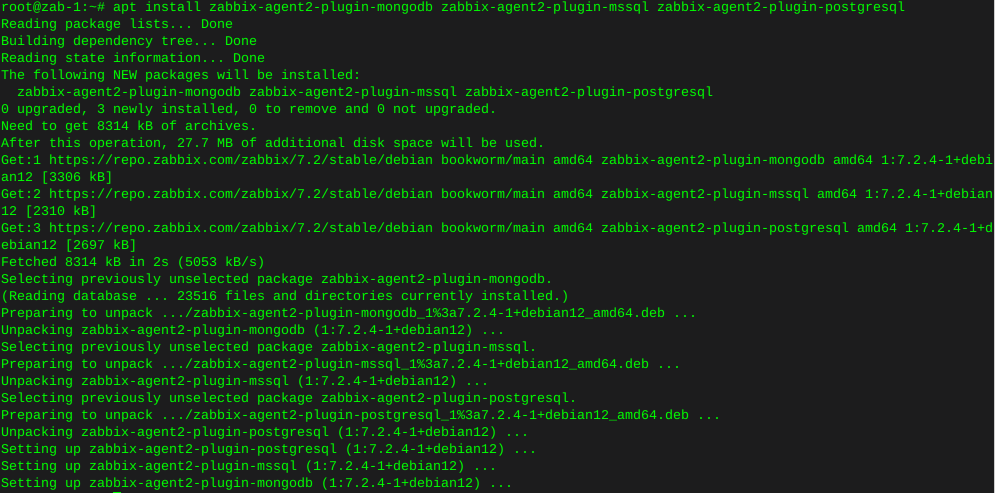
      Install plugins

      apt install zabbix-agent2-plugin-mongodb zabbix-agent2-plugin-mssql zabbix-agent2-plugin-postgresql

      zab5.png

      Install mysql

      wget https://dev.mysql.com/get/mysql-apt-config_0.8.30-1_all.deb

      zab-6sql.png

      sudo dpkg -i mysql-apt-config_0.8.30-1_all.deb

      Error on this new install, where lsb-release is not installed

      zab7sql-error.png

      apt-get install lsb-release

      zab7lsb.png

      Try again…

      dpkg -i mysql-apt-config_0.8.30-1_all.deb

      Error, gnupg not installed

      zab7gnupgerror.png

      apt install gnupg2

      zab7gnupg2.png

      Give it another go…

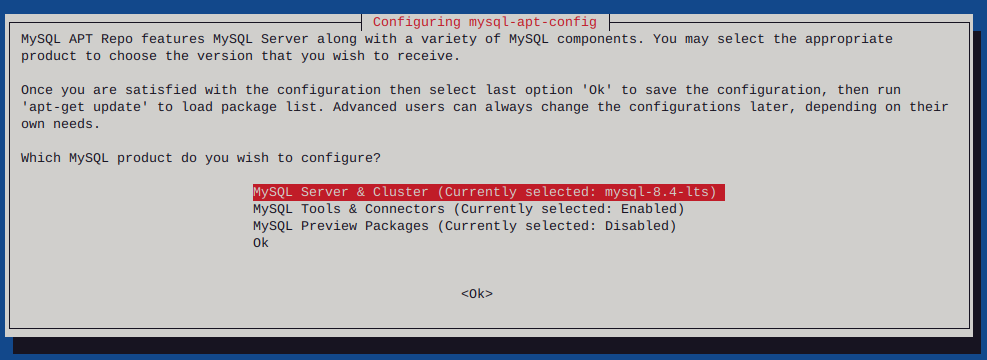
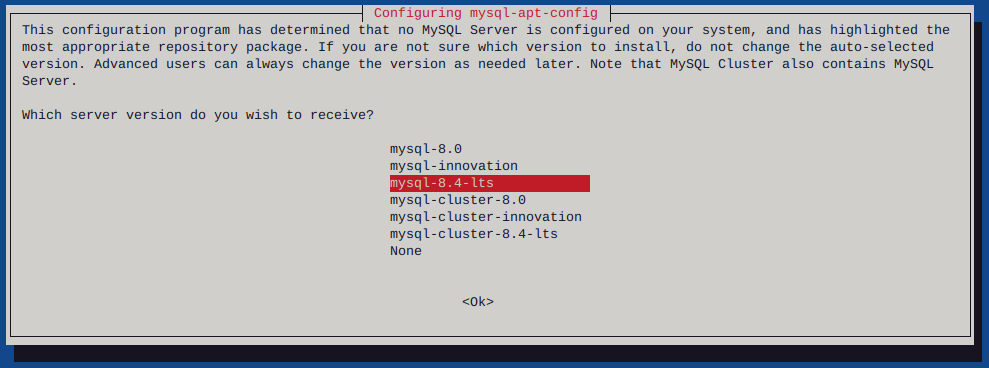
      dpkg -i mysql-apt-config_0.8.30-1_all.deb

      zab7sqltui.png

      zab7sql.png

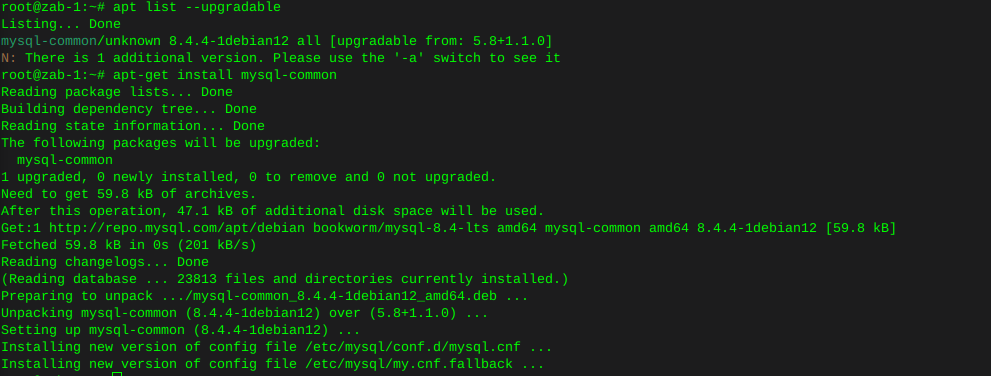
      I had to list upgradable packages :

      apt-list --upgradable

      Which spit out : mysql-common/unknown 8.4.4-1debian12 all [upgradable from: 5.8+1.1.0]

      Then installed mysql-common

      apt-get install mysql-common

      zabbix-7-sqlgoofs.png

      Had to uninstall Mariadb to resolve these conflicts

      apt remove mariadb-client-core

      Then install mysql-server:

      apt install mysql-server

      zab7-sql-common.png

      zab7-sql-rootpass.png

      Enter your password, twice

      Now enter mysql by typing :

      mysql -u root -p

      zab7-mysql-enter.png

      Enter the following command individually Where ‘password’ is where you type in your actual own password

      mysql> create database zabbix character set utf8mb4 collate utf8mb4_bin; mysql> create user zabbix@localhost identified by 'password'; mysql> grant all privileges on zabbix.* to zabbix@localhost; mysql> set global log_bin_trust_function_creators = 1; mysql> quit;

      Populate the database with zabbix script

      zcat /usr/share/zabbix/sql-scripts/mysql/server.sql.gz | mysql --default-character-set=utf8mb4 -uzabbix -p zabbix mysql --u root -p set global log_bin_trust_function_creators = 0; quit;

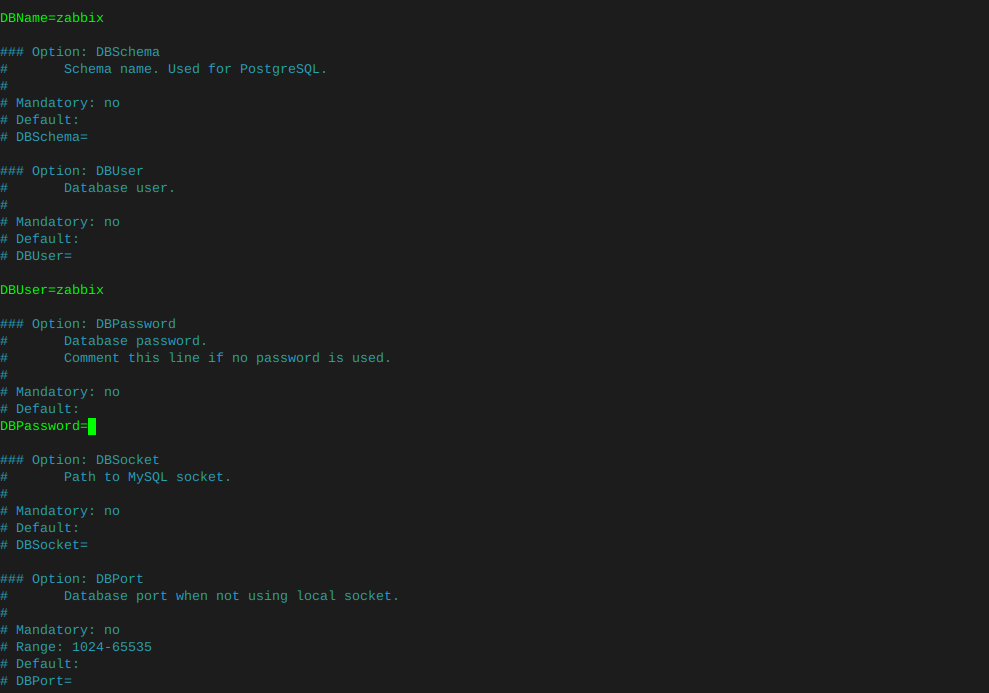
      Edit file /etc/zabbix/zabbix_server.conf You can use nano

      nano /etc/zabbix/zabbix_server.conf

      Uncomment the DBPassword section, and type your password

      zabbix-dbpassword.png

      Then hold ctrl and tap x, it will ask if you want to save changes.

      Enable services:

      systemctl enable zabbix-server zabbix-agent2 nginx php8.2-fpm systemctl restart zabbix-server zabbix-agent2 nginx php8.2-fpm

      Check that zabbix service has started

      journalctl -xeu zabbix-server.service

      zabbix7startjob.png

      Delete the 'default site in nginx

      sudo rm -rf /etc/nginx/sites-enabled/default

      Make sure the symbolic link to the zabbix nginx file is present

      ln -s /etc/zabbix/nginx.conf /etc/nginx/sites-enabled/zabbix.conf

      Check that the zabbix nginx file is in the includes in nginx config

      nano /etc/nginx/nginx.conf

      Look for :

      include /etc/nginx/sites-enabled/*

      Now restart nginx

      systemctl restart nginx

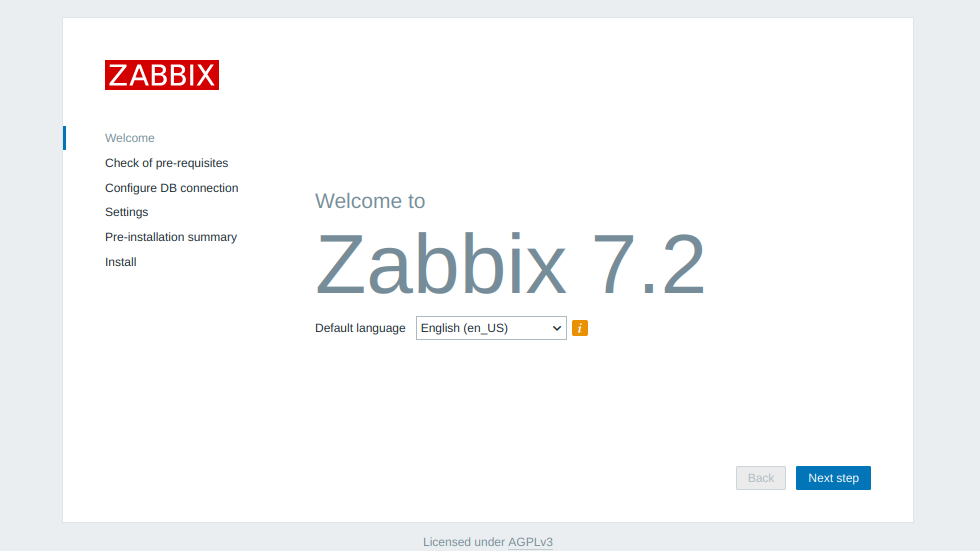
      Hit the browser and type in the IP (or URL that you may have put in the zabbix nginx config file)

      zabbix.png

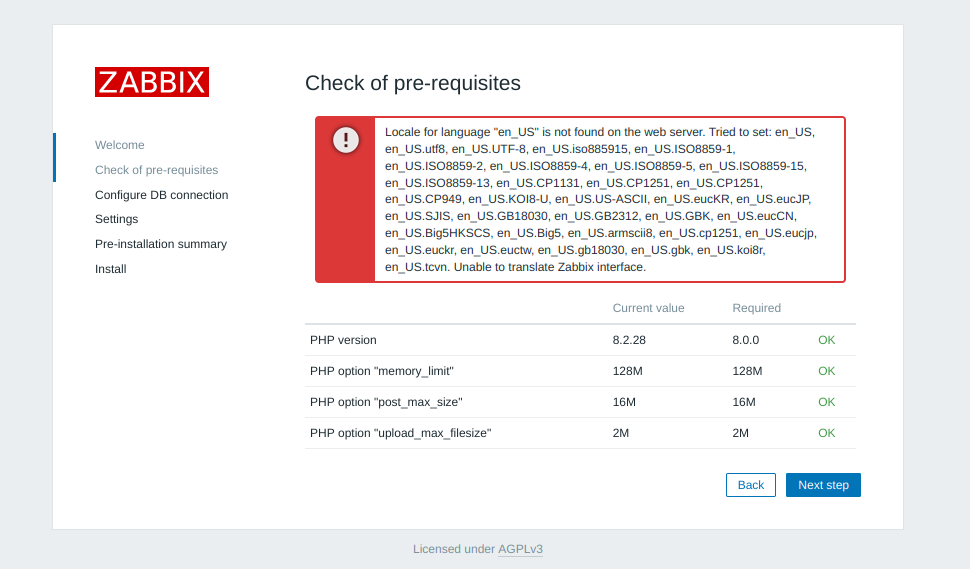
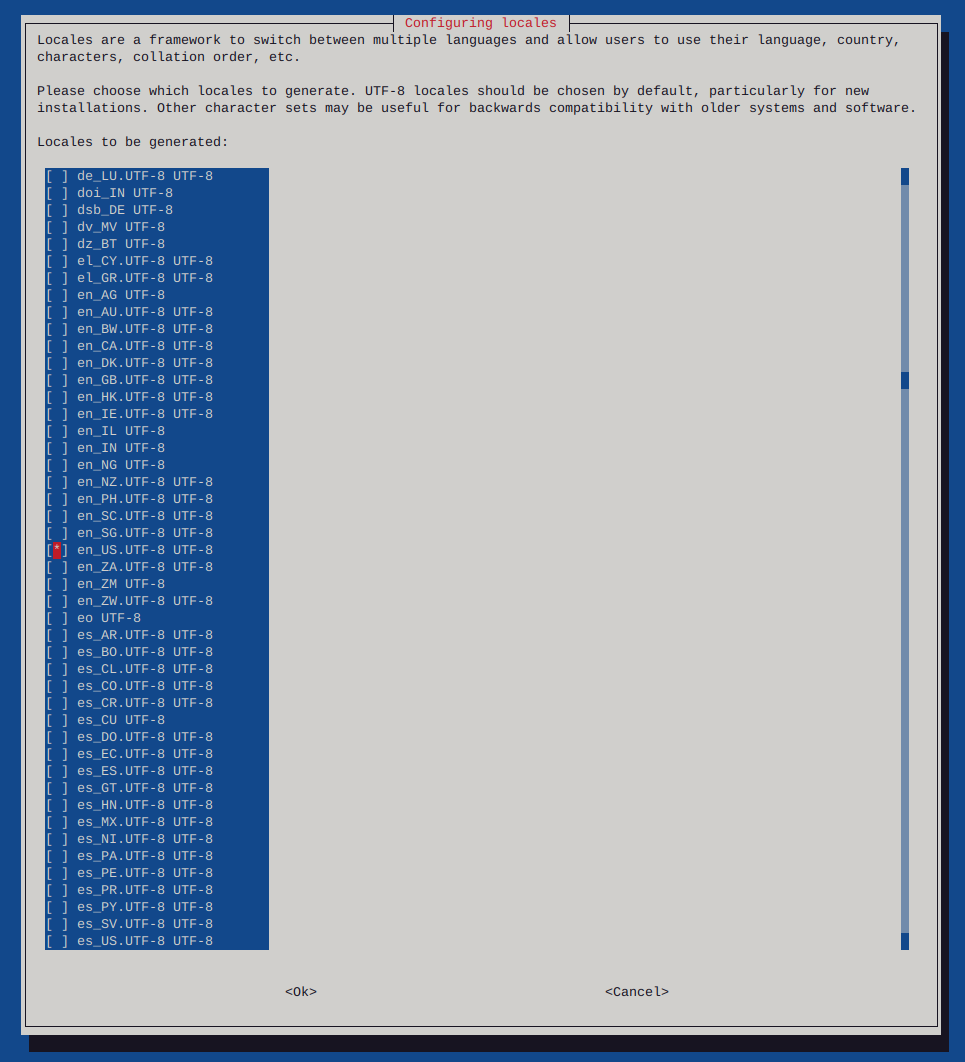
      Make sure to configure locales

      zabbix-locales.png

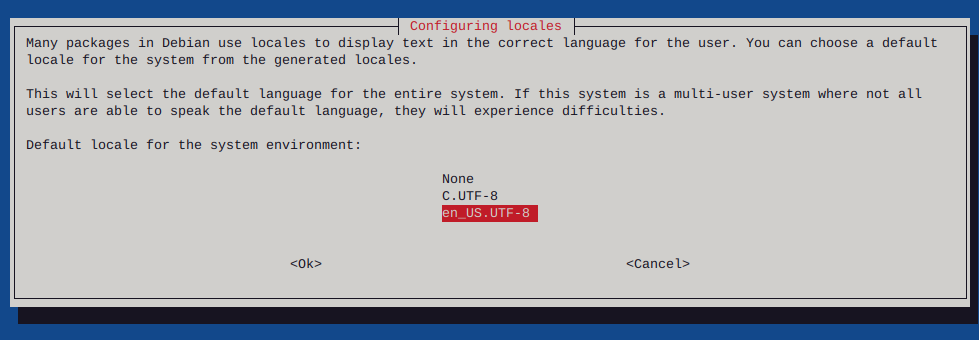
      sudo dpkg-reconfigure locales

      zabbixlocalestui.png

      zabbix-locales-2.png

      zabbix-locales-command.png

      Reboot the system

      sudo shutdown -r now

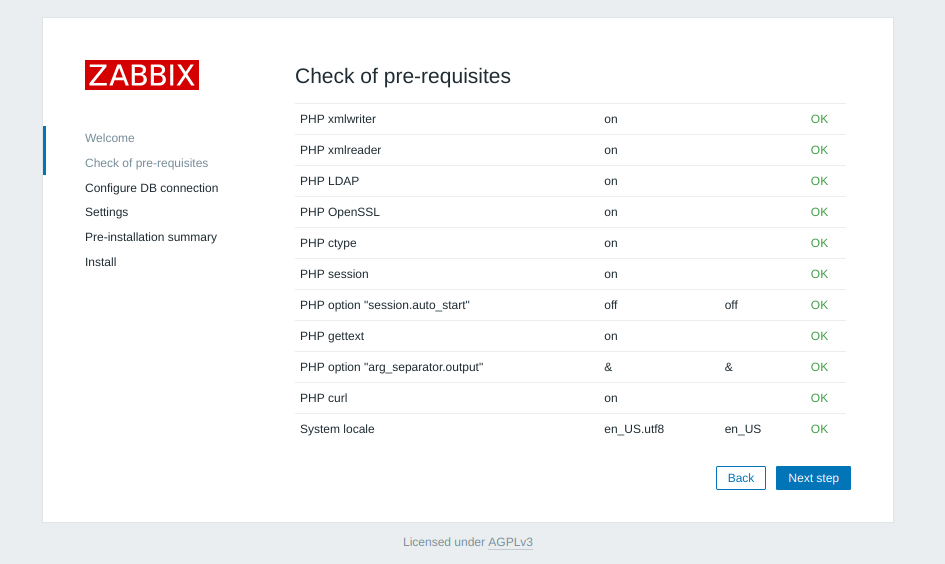
      zabbix-utf.png

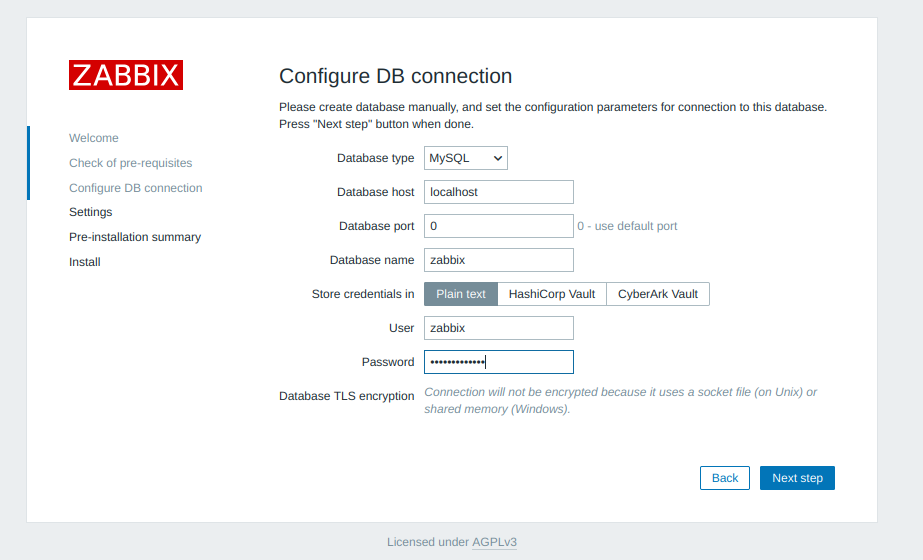
      Add your database password

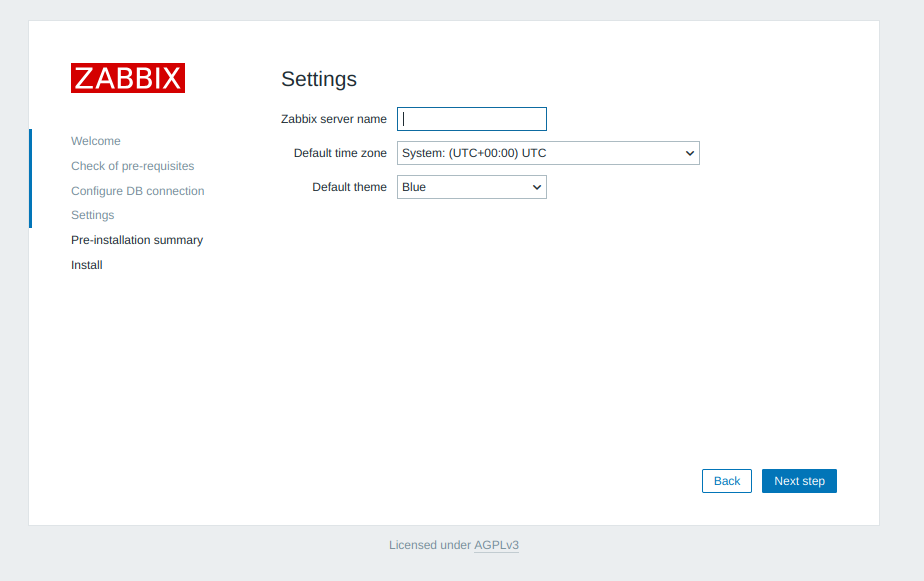
      zabbix-db.png

      Add a server name

      zabbix-servername.png

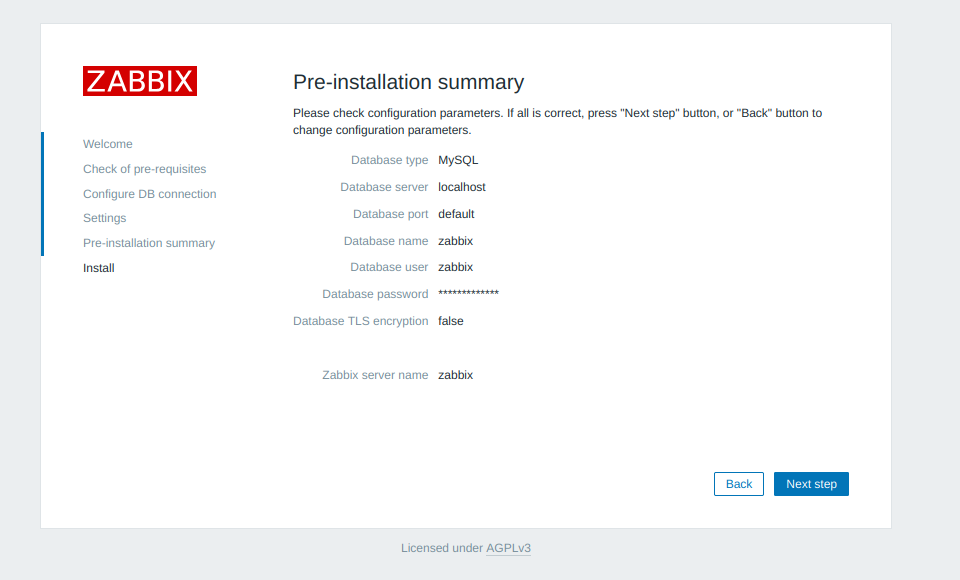
      zabbix-summary.png

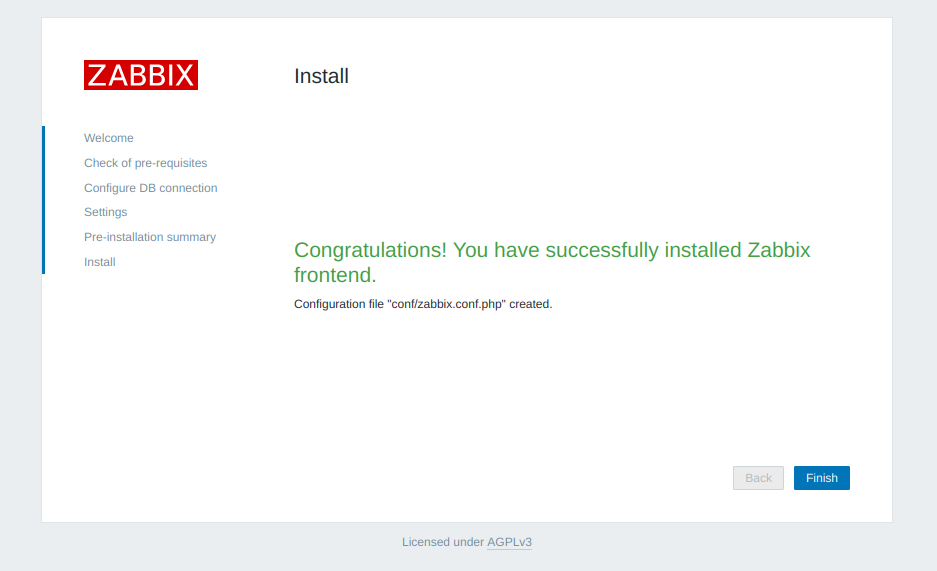
      zabbix-config.png

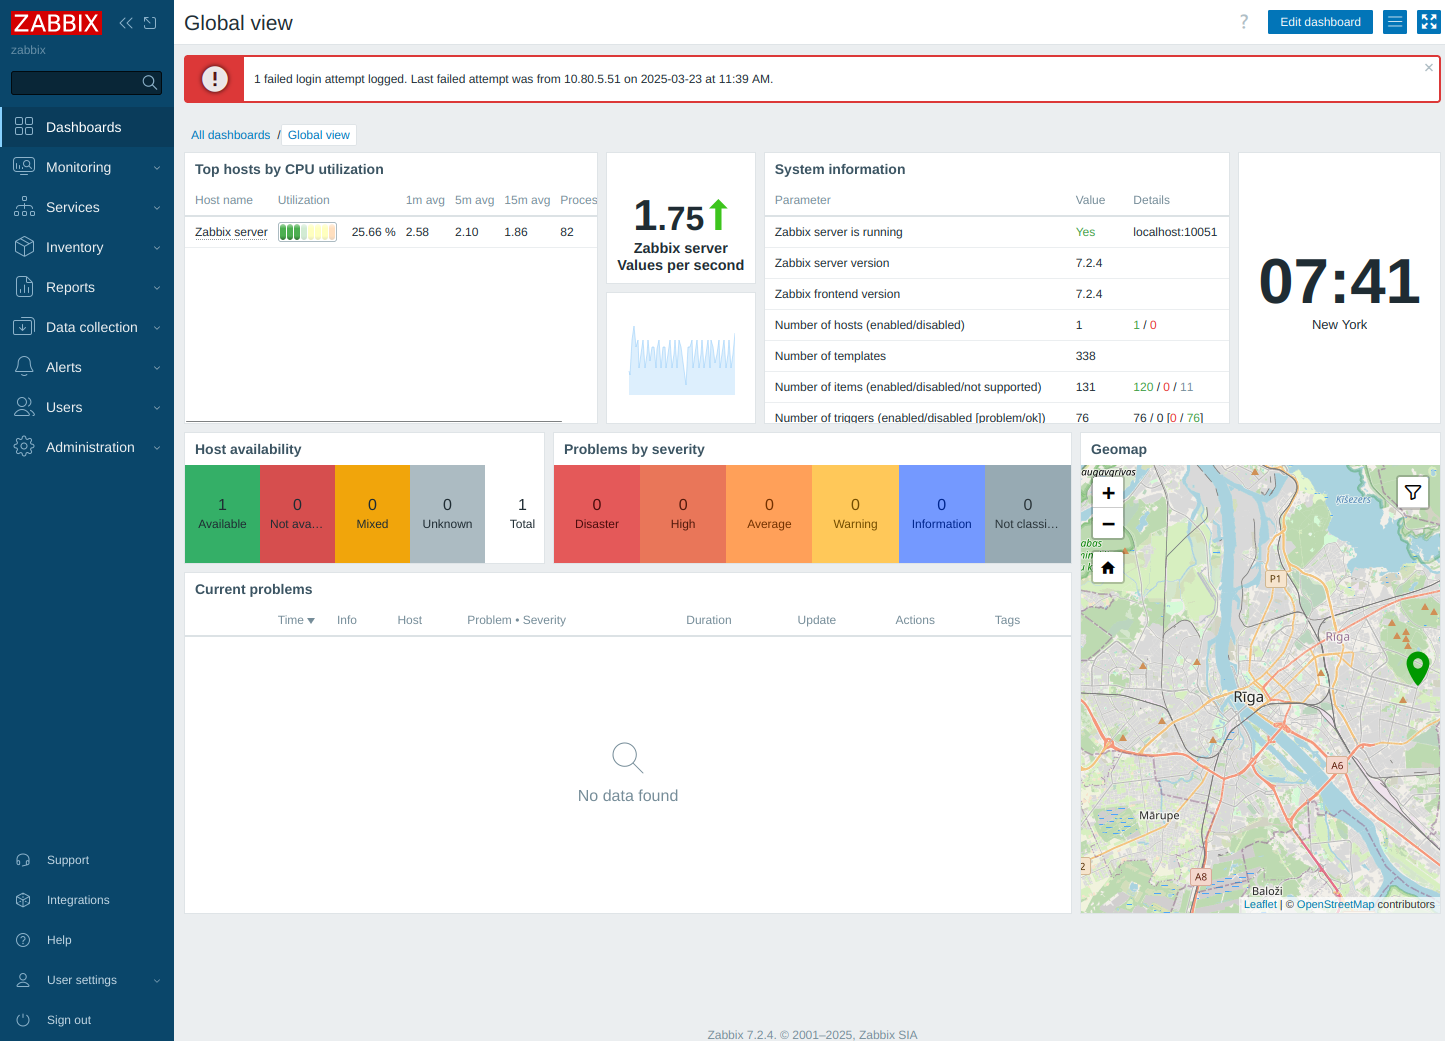
      The default username is Admin, and the password is zabbix

      zabbix-home.png

      read more

    • rickR
      rick
      Unable to negotiate with 10.10.1.35 port 22: no matching host key type found. Their offer: ssh-rsa,ssh-dss

      While attempting ssh this error is generally due to mismatched versions of ssh, where an up to date version is attempting to access an older version

      Add the following to your command :

      The proper way:

      ssh -o KexAlgorithms=diffie-hellman-group14-sha1 -oHostKeyAlgorithms=+ssh-dss 10.10.1.35

      The cheap way:

      Example :

      ssh -oHostKeyAlgorithms=+ssh-dss 10.10.1.35

      or ssh -oHostKeyAlgorithms=+ssh-dss user@10.10.1.35

      This can be added to the ~/.ssh/config file

      Host my-server HostName 10.10.1.35 HostKeyAlgorithms=+ssh-dss
      read more
    • Login

    • Don't have an account? Register

    • Login or register to search.
    • First post
      Last post