Skip to content

Format & Partition USB Drive Command line / Terminal :the simple way:

Linux Systems Guides
  • First and most importantly, we need to locate the correct drive. In a terminal session (command line), type:

    Try to type the commands in, instead of copy/paste, this helps with retention for next time.

    lsblk
    

    In other words, ‘List Block Devices’

    This command will list all block devices, hard drives, USB drives, scsi devices, RAID devices and their partitions.

    In this case here is what is displayed:

    NAME                        MAJ:MIN RM   SIZE RO TYPE   MOUNTPOINT
    sda                           8:0    0 465.8G  0 disk   
    └─isw_ccheigfjba_Volume0    254:0    0 931.5G  0 dmraid 
      ├─isw_ccheigfjba_Volume01 254:1    0 893.8G  0 dmraid /
      └─isw_ccheigfjba_Volume05 254:2    0  37.7G  0 dmraid 
    sdb                           8:16   0 465.8G  0 disk   
    └─isw_ccheigfjba_Volume0    254:0    0 931.5G  0 dmraid 
      ├─isw_ccheigfjba_Volume01 254:1    0 893.8G  0 dmraid /
      └─isw_ccheigfjba_Volume05 254:2    0  37.7G  0 dmraid 
    sdc                           8:32   1   1.9G  0 disk   
    └─sdc1                        8:33   1   1.1G  0 part 
    

    We can see ‘sda’ and ‘sdb’ are defined as raid members. Where sdc is a disk, which has one partition ‘sdc1’ ,which is in this case the USB drive we will be working with.


    Unmount the device

    umount /dev/sdc
    

    The USB device will not always be automatically mounted upon insertion, even if it shows as a block device. Depending on previous configurations, so don’t be concerned after running the command if you are told ‘umount: /dev/sdc: not mounted’


    At this point we are ready to format and partition the device in one command.

    NOTE: Continuing will permanently Destroy and Delete anything on the chosen device.

    Format USB Drive:

    mkfs.msdos -n 'random' -I /dev/sdc
    

    Where: mkfs.msdos = make file system & partition as msdos

    -n = Name the Volume

    -I = Partitioning within the block device itself

    /dev = Device

    /dev/sdc = the device we are formatting and partitioning


    The output:

    mkfs.fat 3.0.27 (2014-11-12)
    mkfs.fat: warning - lowercase labels might not work properly with DOS or Windows
    

    If you are greeted with something to the effect of:

    mkfs.msdos: unable to open /dev/sdc: Device or resource busy

    Chances are your USB drive is write protected.

    You may be required to install hdparm:

    sudo apt-get install hdparm
    

    Then remove the write protection by running:

    sudo hdparm -r0 /dev/sdc
    

    Output:

    /dev/sdc:
     setting readonly to 0 (off)
     readonly      =  0 (off)
    

    If your still getting errors and care not to save Any data on the drive, you can write zeros to the device by running:

    sudo dd if=/dev/zero of=/dev/sdc  bs=512  count=1
    

    Then go ahead and try formatting again.

    After a successful format, the version, and a warning should be self explanatory.

    At this point, the device should have been formatted and partitioned, time depends on how large and complex the partitioning scheme.

    In formatting this particular device, a 2GB USB drive, the time was ~3 seconds, for reference.


    There are many other type of partitions we can use, such as the following, however in this case, I’m going to be transferring an ISO from one (linux) machine to a non networked (windows) machine. Where msdos is highly compatible.

    Examples of file system types: mkfs.msdos; mkfs.ext2; mkfs.ext3; mkfs.ext4; mkfs.vfat and many more depending on the intended application.


    You can re-list all block devices to see your final result. Only this time, we want to verify the file system type, so we add the ‘-f’ flag

    lsblk -f
    
    NAME                        FSTYPE          LABEL  UUID                                 MOUNTPOINT
    sda                         isw_raid_member                                             
    └─isw_ccheigfjba_Volume0                                                                
      ├─isw_ccheigfjba_Volume01 ext4                   5ba67ace-a42d-404b-a6dc-eb2a73e8429c /
      └─isw_ccheigfjba_Volume05 swap                   66b5b874-e24c-45df-a669-4b205affa2fc 
    sdb                         isw_raid_member                                             
    └─isw_ccheigfjba_Volume0                                                                
      ├─isw_ccheigfjba_Volume01 ext4                   5ba67ace-a42d-404b-a6dc-eb2a73e8429c /
      └─isw_ccheigfjba_Volume05 swap                   66b5b874-e24c-45df-a669-4b205affa2fc 
    sdc                         vfat            random 2B9E-2530                            /media/rick/random
    

    As we can see, now /dev/sdc has been formatted and partitioned vfat, which is essentially the same as FAT32 and allows the use of longer volume names, post WIN95.

    In other words, it’s compatible for basic storage on linux, as well as readable on windows versions supplied in the last ~20 years.

    Fin!

FreeBSD Notes
  • rickR

    Screen recording can use webm as their format, it can be more simple to use a gif to embed into a website or forum, than adding scripts to host different video format.

    In this case I grabbed a screen record of the progress for writing zeros to a hard drive with dd

    Use ffmpeg to convert webm to gif:

    First create a pallet:

    Move into the directory which the webm is located, or type in the path

    Where ‘dd.webm’ is the screen recording

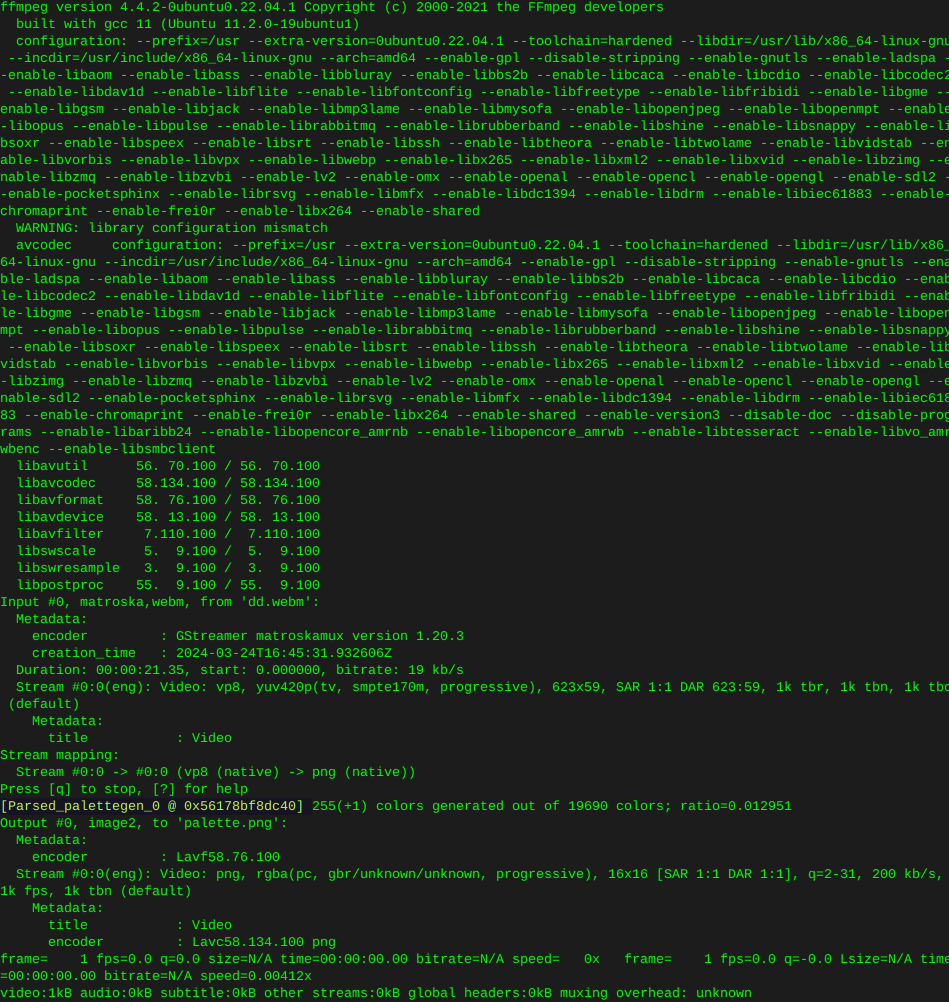
    ffmpeg -y -i dd.webm -vf palettegen palette.png

    Output:

    dd-ffmpeg.png

    Then convert the webm to gif:

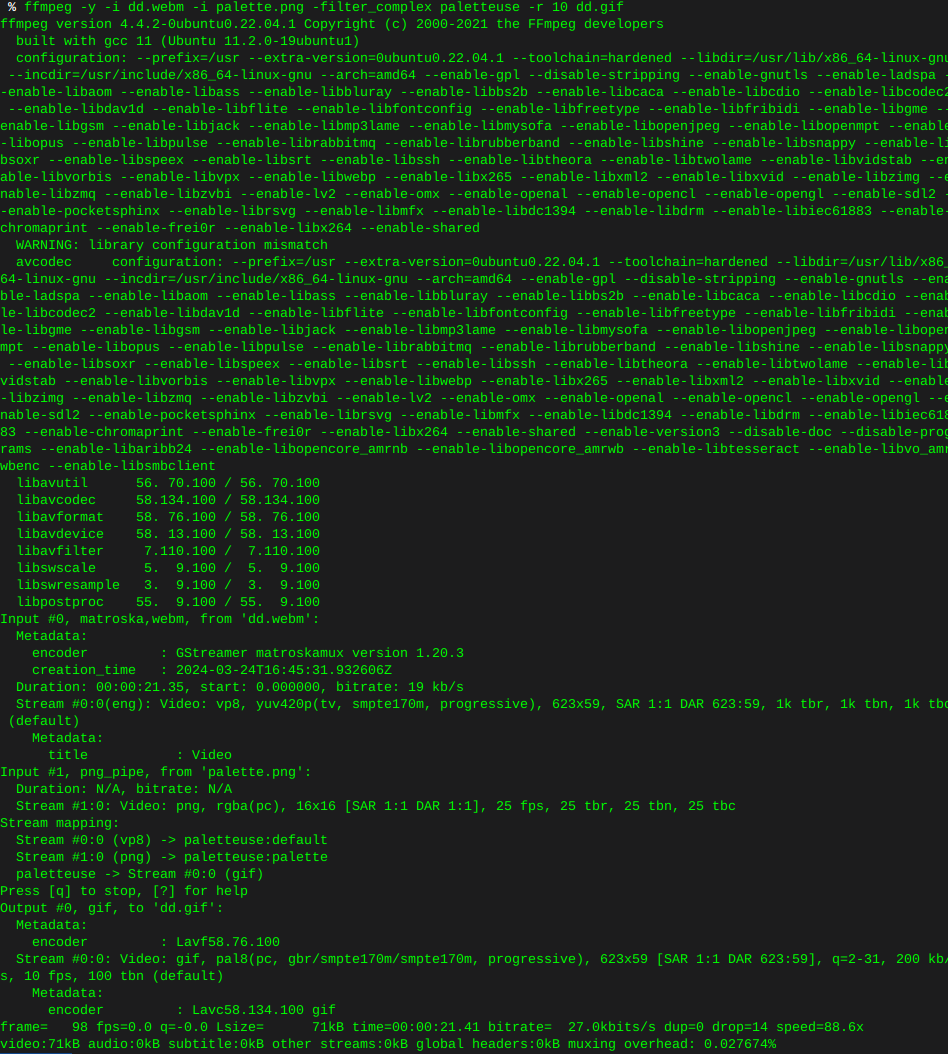
    ffmpeg -y -i dd.webm -i palette.png -filter_complex paletteuse -r 10 dd.gif

    dd-webm-2.png

    This is what I ended up with, looks like any image of any alien on the interwebz, as if shot through a potato, some tweaking of the command is in my future. None the less.

    dd.gif

    read more

  • rickR

    Write zeros to all sectors

    Use the command ‘lsblk’ to find the drive you wish to erase

    I’m using ‘dd’ to erase things

    In this case I’m torching sdb

    Only use status=progress if you care it’s not necessary

    dd if=/dev/zero of=/dev/sdb bs=12M status=progress

    dd.gif

    read more

  • rickR

    Remove old kernel images that are cluttering the system

    zstd-no-space-error.png

    Most of these errors are due to low or not enough space left in the root partition.

    If you are using a Debian flavor:

    sudo apt-get autoremove --purge

    zstd-error.png

    Inform grub whenever an old kernel is removed:

    update grub

    update-grub.png

    Remove the un-used kernel config files:

    These will be the files pre cursed as ‘rc’ where installed kernels use ‘ii’

    … As well as files no longer used or required due to dependencies

    This command will detect, print, and remove left over cruft from previously installed packages or scripts, that have been removed or updated.

    sudo dpkg --purge $(dpkg -l | awk '/^rc/{print $2}')

    purge.png

    You can re-run the following to view the installed kernel(s):

    dpkg --list | grep linux-image

    installed-kernels.png

    read more

  • rickR

    To list all files in current directory including dot files (hidden files or directories), as well as print permissions :

    ls -la
    read more

  • rickR
    Install Ruby on Debian

    Install rbenv

    sudo apt install rbenv

    Then initialize the environment:

    rbenv init

    rbenv-init.png

    nano ~/.bashrc

    Type or paste the output above, Ctrl +x to save

    Apply:

    source .bashrc

    Install ruby-build

    Install git:

    sudo apt install git

    install-git.png

    mkdir -p "$(rbenv root)"/plugins

    Clone to local:

    git clone https://github.com/rbenv/ruby-build.git "$(rbenv root)"/plugins/ruby-build

    clone-ruby.png

    curl -fsSL https://github.com/rbenv/rbenv-installer/raw/main/bin/rbenv-doctor | bash

    ruby-doctor.png

    Now install Ruby:

    print ruby versions available

    rbenv install --list

    rb-list.png

    Install the latest version unless you have a reason otherwise:

    rbenv install 3.3.0

    On this system there was an error compiling at this point with fiddle, as well as psych: ruby-failed.png

    Therefore manually installing the following filled dependencies

    sudo apt install libtool sudo apt install libffi-dev

    rb-compile.png

    rbenv global 3.3.0

    print installed ruby version

    ruby -v

    ruby-version-installed.png

    read more